How to Vinyl Wrap a Car
7 Steps Used by Professionals
Have you considered vinyl wrapping your car but don’t know where to start? What are the pros and cons of vinyl wrapping? Does it have to be done by a professional? How much material should you buy? At Apex Customs, we wrap a lot of vehicles, and we don’t mind telling you how we do it. That’s why we are sharing our secrets on How to Vinyl Wrap a Car.
The truth is that you CAN do it at home by following the same seven steps we do. However, if after going through the process, you decide that this project is more than you want to tackle, contact us now. We’d be happy to give you quote on your new vinyl wrap.

Step 1: Planning Out How to Vinyl Wrap Your Car
Before you begin ordering vinyl or prepping the vehicle, you need to plan out the project. Measure every panel you plan to wrap (hood, quarter panel, bumper, etc.). Once you have the length and width measured, multiply them together to get the amount of material needed for that element. After you have figured the area for all the sections you plan to wrap, add them together. Then add another ten square-feet to the number, and you have the amount of film you need to order.
Do not skimp! You will need plenty of extra vinyl. Mistakes happen, even by professionals, and you will not be able to reuse the film. Also, there needs to be enough overhang to tuck the edges. We cannot emphasize this enough - order more than vinyl wrap than you think you need!
Make sure you order a high-quality of vinyl. You get what you pay for when it comes to wrapping. Avery and 3M offer a quality product that will not damage your paint. Lower-priced products can feel and look the same but are often less durable and discolor over time.
Tools Needed to Vinyl Wrap a Car
- Heat Gun
- Squeegee
- Cutting Blade
- Cutting Tape
- Cleaning Solution
- Measuring Tape
- Gloves
- Infrared Thermometer
Before you begin wrapping, you need to remove any trim, inside liners, moldings, handles, etc. that might prevent you from covering an area entirely. Make sure you have plenty of room to work. Even if a handle does not cover the surface you plan to work on, if it impedes your movement at all, you need to remove it.
Identify the areas that might be a cause for concern. Which pieces have a lot of curves (such as the bumper) that will create tension on the wrap? Are there issues with the paint? Does the car need bodywork? Vinyl, like color, shows every imperfection once it’s applied. It’s imperative that you fix anything that is not perfectly smooth on the vehicle surface.
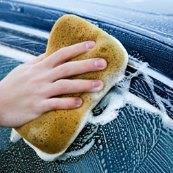
Step 2: Clean & Prep the Car Before Vehicle Wrapping
This step is crucial to the success of your project. Your car must be free of all dirt, dust, debris, and imperfections. Use a degreaser to remove any residue on the car. After the degreaser, go back over the same area with 70% Isopropyl Alcohol. Make sure your work area is clean. Sweep out your garage area before you clean your car to make sure none of the particles settle back onto the vehicle.
Once your car looks clean, put on a pair of gloves and run your fingers over the surface. Can you feel any imperfections? Like paint, vinyl will show every chip, scratch, or bump on the car. It’s possible you may need to do some bodywork if you do not have a smooth surface.
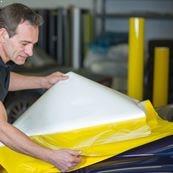
Step 3: Measure and Cut Your Vinyl Wrap
Once everything is removed, and the surface appears clean, you will want to measure out your first piece of vinyl. If this is your first time applying vinyl wrap, we suggest you start with a small flat surface such as a quarter-panel. Cut a piece that is roughly 4-inches longer and wider than the panel you are wrapping.
If you are skilled, you can trim the material to a smaller size if you are looking to save money on the vinyl. However, for beginners, it is easier to work with more vinyl than less. The vinyl comes in a 60 inch roll by 25 feet in length. Some companies will sell less material based on the project, but the standard roll is 60 inches or 5 feet. Most panels on a vehicle are smaller than 60 inches, but there are times when you have to cut multiple pieces for an oversized hood, roof, or trunk.
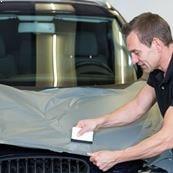
Step 4: How to Apply Vinyl Wrap to the Car
Double check that the surface is still free of any dust and debris that might have been floating around while you were taking measurements. If possible, have a second person on hand to help with the application. It’s possible to do it by yourself, but it’s much easier to handle the vinyl when there are two sets of hands. Double check that your hands are clean and then pull the backing off your cut piece.
Once the backing is off, the adhesive will be tacky but will not adhere until pressure is applied. Start in the middle and work your way to the outside edges. Keep the tips off the surface of the car so that air does not get trapped.
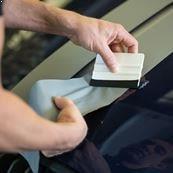
Use the squeegee and press down on the film with even pressure at your starting point. Slowly work out from your center point, making sure that the vinyl is smooth.
Once you have all the air released and your wrap is perfectly flat, test your work by using the heat gun on the area that you just flattened. If any air is trapped, it will bubble, and you can push the air out if the vinyl has air release. Heating before you make your cuts ensures that you can lift the material off the vehicle if trapped air is too stubborn to release.
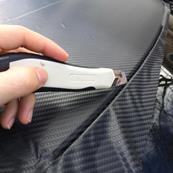
Step 5: Cut Away the Extra Vinyl Wrap
One of the most important things to remember during this step is that the knife you use to cut the wrap will also cut the paint underneath. If you slice through into the car, you could be forced to remove the film and repair the damage before continuing.
Trim the vinyl so that there is roughly ¼ cm overhanging all the edges of your panel. This extra should be enough to tuck around the edges or cover any cracks Always keep the blade off the vehicle. Because of the difficulty involved, you should practice on smaller areas before wrapping the body paint if you are inexperienced with vinyl wrapping.
Step 6: Tucking Vinyl Edges
After you make all the cuts, you need to tuck all your edges. This step sounds easy, but it can make the difference between a professional look and a “DIY look.” A proper wrap shouldn’t have wrinkles (fingers), and it shouldn’t lift. If there is too much stretch or tension, the edges will fail.
Unfortunately, if you stretch the vinyl too far, you could be forced to remove the whole panel and start over. Use your thermometer and heat gun to ease the tension on sharp curves. Heating the vinyl to about 90 degrees will soften it enough to help even out wrinkles. Avoid overheating, or you will cause the material to degrade.

Step 7: Heat the Vinyl Wrap and Set it In Place
The final step involves a quality post heat over what you’ve just laid, cut, and tucked. Post heating the surface will make sure that there isn’t too much tension on any area and will usually reveal warning signs of failure. If the vinyl curls or pops up, you need to re-apply that section. Any failure at this point will only get worse once exposed to the sun.
Once your vinyl wrap is smooth, and all the imperfections have been fixed, then clean it with some alcohol and inspect your work.
Final Words of Advice on How to Vinyl Wrap Your Car
f you take the time to vinyl wrap your car the proper way, then later if you choose to remove your wrap, your paint should be 100% factory-original. High-quality vinyl and proper application techniques do not damage your car’s paint. In fact, it offers a layer of protection that can last for years.
The cost of a vinyl wrap is significantly less than a quality paint job. Vinyl wraps are highly customizable and one of the best investments for commercial applications.
By following these 7 Steps on How to Vinyl Wrap a Car, you can have a professional looking wrap and save a bit of money. However, you might be surprised at how little it costs to have your car wrapped professionally. Give us a call. We would be happy to shoot you a quote for your project.
